This is a step-by-step guide to scheduling an eCard campaign to send at a later date/time.
Follow the instructions on this page to create, test, send and view reports for a scheduled eCard campaign.
Name your campaign
Click Create eCard then enter an eCard Campaign name:

Choose an eCard design
Select an occasion - such as 'Birthday' or Christmas and then click Select on the eCard design you want to send.
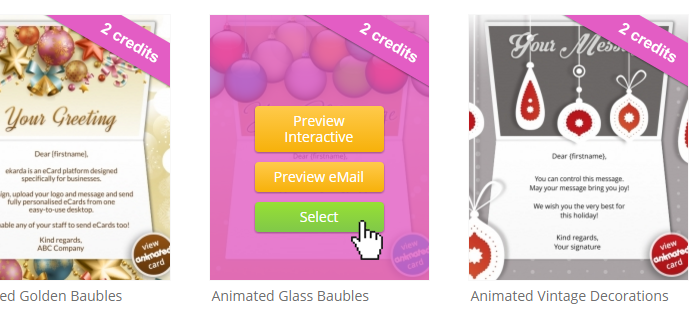
Click Next when you're done.
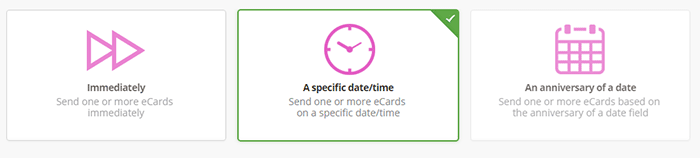
Choose when to send the eCard
There are 3 options for when to send your eCard. In this case you will choose A specific date/time.
Choose when you'd like to schedule the campaign
Select the Date, Time and Time Zone you'd like to to schedule your campaign.
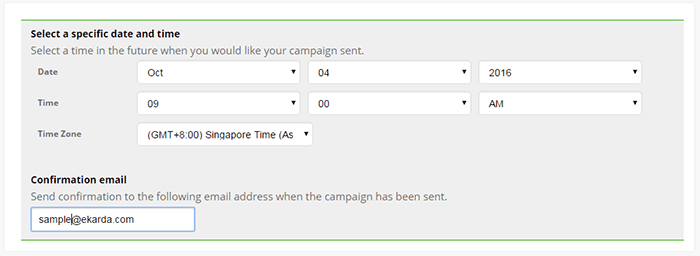
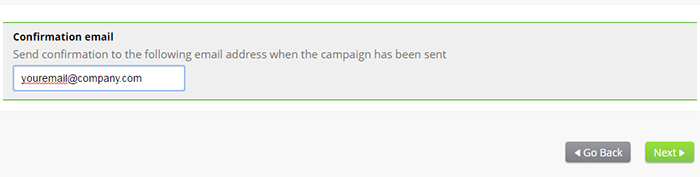
Enter a confirmation email
You can leave the confirmation email address as it is or enter a different email address.
When your campaign has completed sending - an email will be sent to this address.
Click Next when you're done.
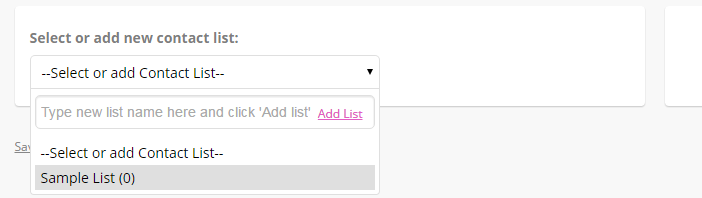
Select a contact list
Select Sample List. You can also add a new contact list.
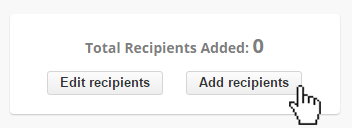
Click 'Add recipients'
Click Add recipients. You will see a number of options for importing contacts. Add the contacts you wish to send your campaign to
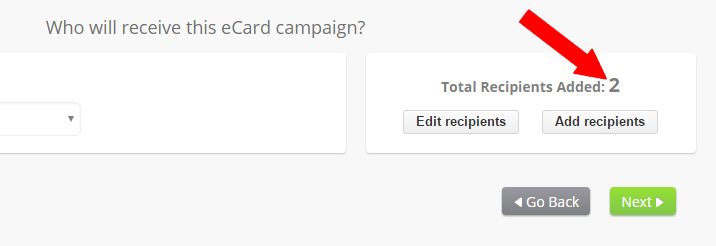
Check the number of recipients
Take a look at the number of recipients added and make sure this is correct.
When you are happy top proceed, click Next
Compose your eCard
Follow the instructions on the screen to compose your eCard.
To personalise each card with each recipient's name and or company - click on Insert personalisation.
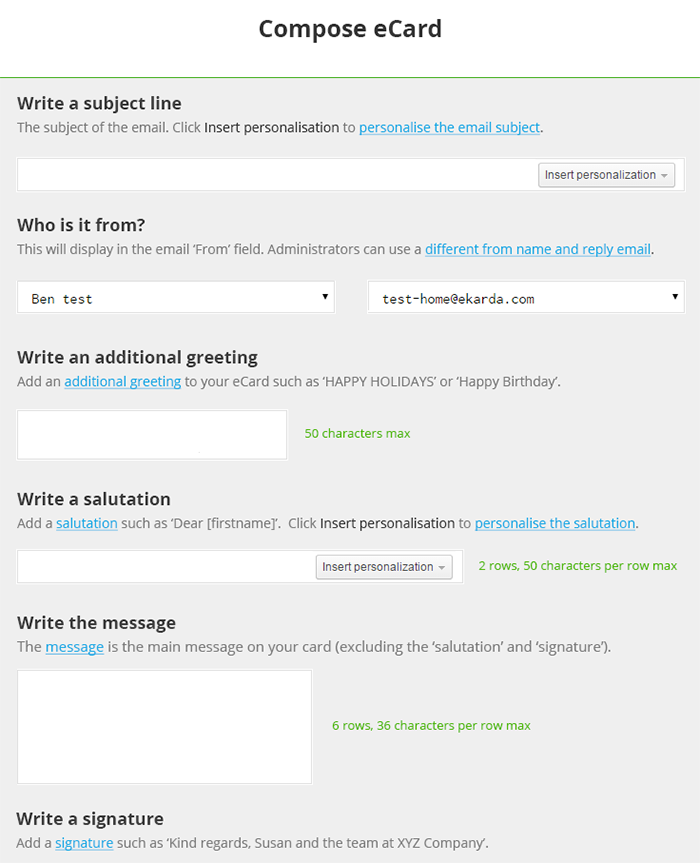
IMPORTANT: To replace the first name of each of your contacts - use the tag [firstname].
If sending your campaign to more than one recipient - You MUST use the [firstname] tag so that each recipient sees their name in thier eCard.
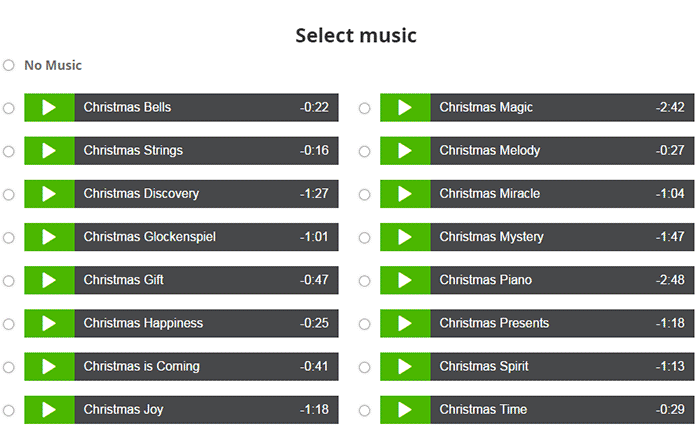
Select your music
If you have chosen to send an interactive card - you'll also need to select music for your card.
You can listen to the different music options by clicking the play button.
Select or add a logo
If your logo is already present - hover over the logo and click Select and proceed to the next step.
Otherwise you can upload a PNG (this is best - especially if the logo has a transparent background), JPG or GIF.
Click Add a new logo and then click Choose File to locate your logo file on your computer.
![]()
Once you've located and selected your logo - insert your Web Address into the text box.
Your web address should look like this: www.company.com (i.e. not 'http://')
When you're done, click Submit
Ensure your logo is selected and click Next
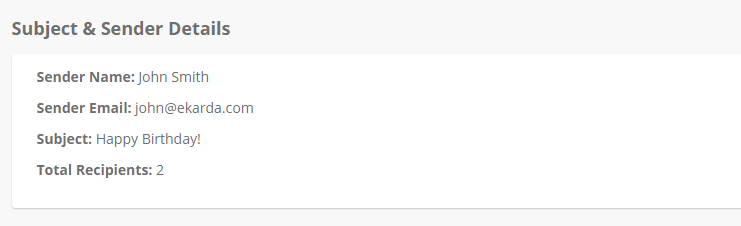
Check your 'Subject & Sender Details' are correct
Check the Subject & Sender Details are correct.
Preview your eCard
Check the preview of the Card Design & Message.
Make sure you are happy with your message and your logo is displayed above the card.
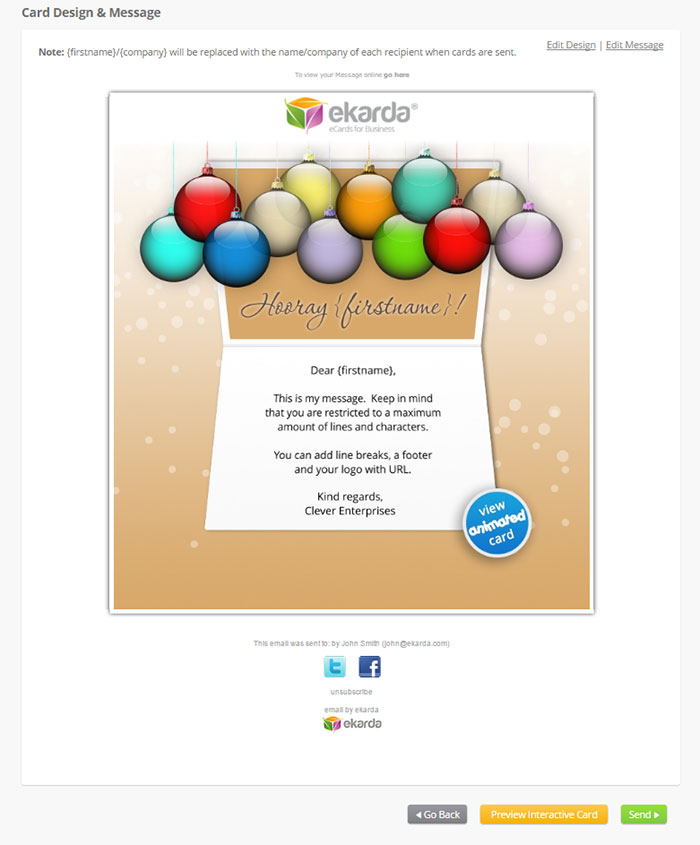
IMPORTANT: Check your personalisation tags are included. To replace the first name of each of your contacts - use the tag [firstname].
You should see the [firstname] tag when previewing your eCard as you can see in the image below.

If you're sending an Interactive eCard - you can also preview the Interactive card. Make sure you're
Schedule your campaign!
Well done - you've completed all the steps. Click the Send button!
Reports and Confirmation
Once your campaign has been sent , status will change to Completed on your My eCards page.
You may need to click 'refresh' on the My eCards page to view status changes.
Once your campaign has been sent, ekarda will also send you a confirmation email.